Bitnami error “The domain does not resolve, please fix it’s DNS entries or remove it”


Table of Contents
ToggleYou’re almost to the finish line! You’ve made it to the part where you are encrypting your website’s data. Now you’re installing your free HTTPS certificate, so you can have that marvelous lock icon next to your search bar then you see this Bitnami error “The domain does not resolve, please fix it’s DNS entries or remove it.” I will walk through the steps I took leading up to the HTTPS Bitnami Configuration Tool error, as well as what I did to resolve it.
When making decisions, I plan out my steps, listing all my foreseeable options, and even perform A-B testing before concluding which direction I should go. With purchasing a domain, there aren’t as many steps involved. I like to pick the most reasonably priced domain registrar that provides the greatest ease-of-use. Most of the time it’s Google, but my alternative choice is Namecheap.
For this domain, which is for our mother-daughter podcast, ‘Down to the River to Pray’, Google was pricing .show domains for $40, recurring each year. Namecheap had a better offer of $6 for the first year, and $24 for each subsequent year. Namecheap was the winner.
I bought the domain and logged into to AWS Lightsail to set up a WordPress virtual server. I chose AWS Lightsail rather than EC2 because it’s the most effortless way to begin using a cloud platform with stable pricing for a small project like single page sites. You can deploy your WordPress site within a few minutes. Plus it offers static IP addresses, auto-backups, and managed databases. EC2 costs more, and although it can be for small scale projects, it can handle the larger, more complex builds.
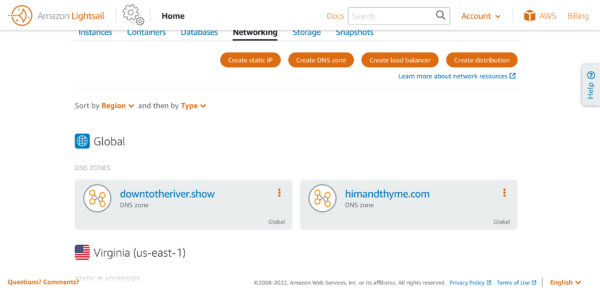
First, I went AWS Lightsail home page and clicked on the Networking tab. Once there, I chose Create DNS zone. I entered my domain, then chose Create DNS zone. I wrote down my server addresses in my notes because I needed to add them to Namecheap’s custom DNS domain records in order to transfer management of my domain’s DNS records to Lightsail.
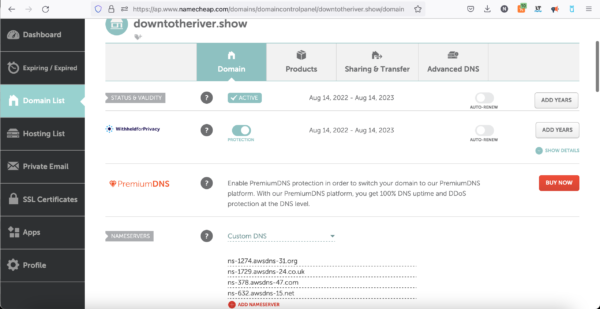
Next, I went to Namecheap, clicked Domain List in the left sidebar, then clicked Manage for the domain I wanted to edit. Under Nameservers, I selected the drop-down box and changed it from Namecheap Basic DNS to Custom DNS. I then added the name server addresses:
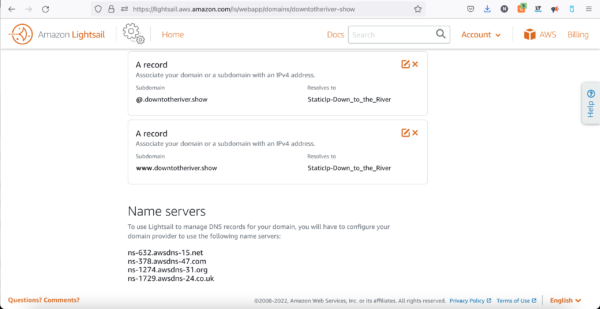
I jumped back over to AWS and added an A record with an @ symbol in the subdomain box to map the apex of the domain to the WordPress instance and attached it to the static IP previously created. Now time for the fun part; waiting.
After verifying that the domain was working properly, I moved over to AWS Lightsail to auto-configure a Let’s Encrypt SSL certificate. First, I SSH to my instance. Once open, I run the following code:

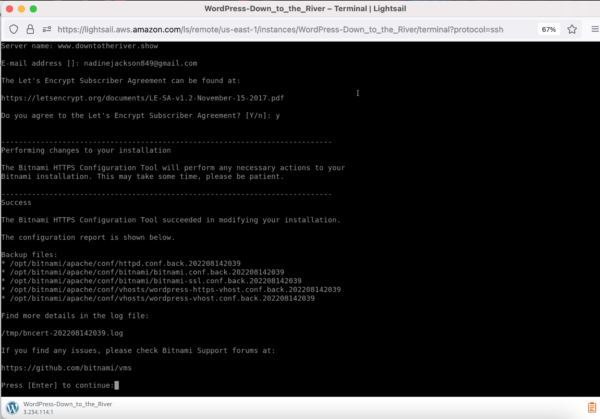
Once the directory was found, I was prompted to enter the domains for which I wanted to create a certificate, using space to separate each. After I pressed enter, I received this Bitnami error : “The domain does not resolve, please fix it’s DNS entries or remove it”.
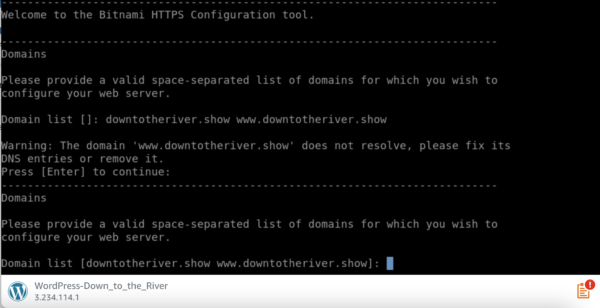
This error is telling me that the Bitnami HTTPS configuration tool is saying the www/non-www domain is not properly configured, as it doesn’t resolve to the same static IP address reserved for the machine. An easy way to ensure both the www and non-www domains were configured correctly using the A record in AWS Lightsail is to go to https://www.whatsmydns.net I run the DNS propagation tool and this is what I see:
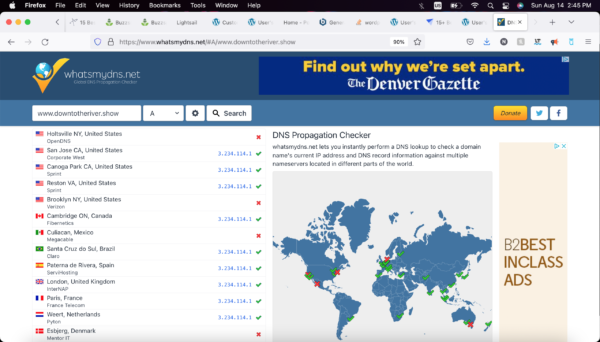
The green checkmarks verify that the correct configuration of the DNS settings, but the DNS propagation is just not fully completed. If the tool continued failing, and I knew for certain that everything was properly configured, I could run the tool without the validations by running this command:
sudo /opt/bitnami/bncert-tool --perform_public_ip_validation 0 --perform_dns_validation 0
When I saw the green check marks, I knew that it was just a waiting game. Within 30 minutes, DNS propagation was complete.

This site uses Akismet to reduce spam. Learn how your comment data is processed.
Great, simple instructions! Wish a lot of other DIYs were like this. Like the blog, keep the faith!
Thanks, Paul! I was struggling with getting it up and running, so I figured someone else might have the same problem. Glad to help. Have a great week!
I was missing the part where I needed to add go to
1. “Domains” >
2. “Assign Domain” and
3. assign my www site > “www.example.com”…
I really appreciate this post, we need people who explain things as exact steps that they took in real life…I’m not a coder, developer, etc. I’m just a guy trying to build a quality, affordable, and secure site. Thanks again.
Ohh I didn’t even consider that, great catch! Thanks for stopping by, Andrew… I hope everything is smooth sailing from here on out.
Hi, I followed your guide! fantastic! I have only one problem, if I access with https the certificate is there. if I access without www or with www, it loads me with http and I don’t have the certificate. How can I do an automatic http to htpps redirect? i use wordpress nginx bitnami AWS
Hi Simon, glad it worked! There are a couple of ways to do this, but it depends on your setup. For this site, I use the Bitnami HTTPS Configuration Tool (bncert-tool) to automatically configure SSL and redirect HTTP to HTTPS. The bncert-tool takes care of generating an SSL certificate using Let’s Encrypt, and setting up the HTTP to HTTPS redirection – all for free.
You can also do this on your own by modifying the NGINX configuration file.
To do this, you would connect to your AWS instance using SSH. You can do this with the following command, replacing your-key.pem with the path to your SSH key file and your-ip-address with the IP address of your AWS instance:
ssh -i your-key.pem bitnami@your-ip-addressOpen the NGINX configuration file for your WordPress installation. This file is usually located at /opt/bitnami/nginx/conf/bitnami/bitnami.conf. You can open it using the nano text editor with the following command:
sudo nano /opt/bitnami/nginx/conf/bitnami/bitnami.confLocate the server block that listens on port 80, which should look like this:
server {listen 80;
...
}
Add the following lines inside the server block to redirect all HTTP traffic to HTTPS:
return 301 https://$host$request_uri;The modified server block should look like this:
server {listen 80;
return 301 https://$host$request_uri;
}
Save the changes and exit the nano text editor by pressing Ctrl + X, then Y, and then Enter.
Restart the NGINX service to apply the changes:
sudo /opt/bitnami/ctlscript.sh restart nginxNow, when you access your website using either http://your-domain.com or http://www.your-domain.com, it should automatically redirect to the HTTPS version.